Monday, October 3, 2011

Subway Art Cookies (courtesy of sweet sugar belle)

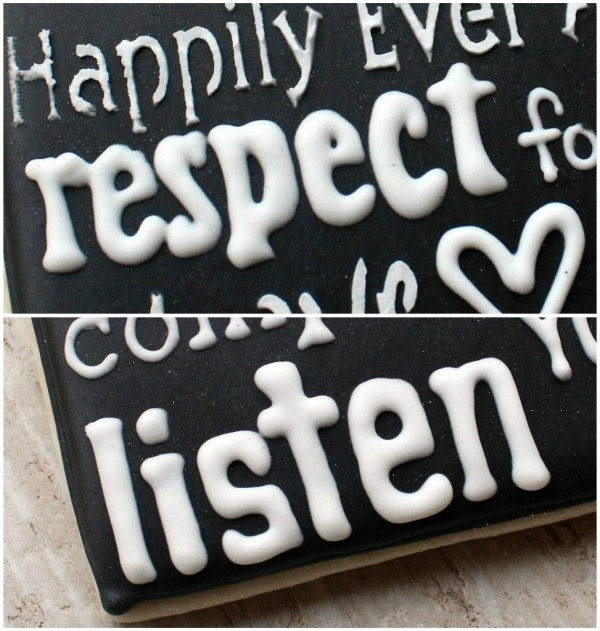
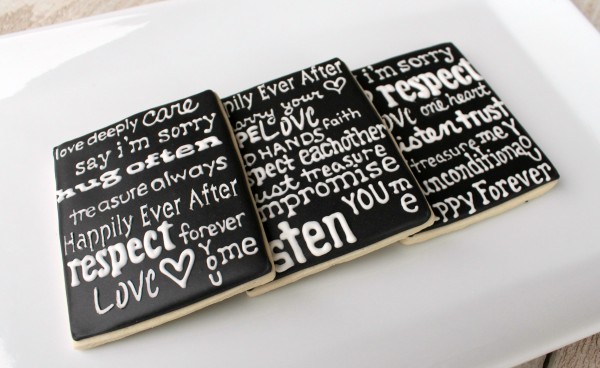
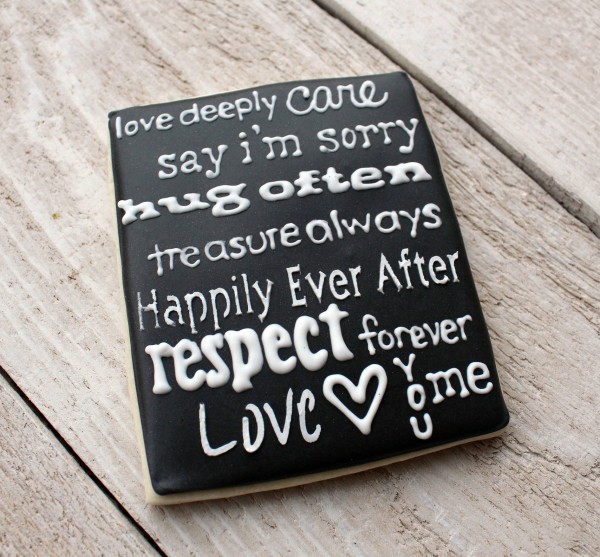
This cookie is what I call a “Monet”.  That just means, like the paintings, these cookies look good from far away, take a closer glance, they are a mess.
By the way, I didn’t make that up.  It’s one of the biggest things I took away from that 90′s era movie, Clueless.  Um, yeah, I might’ve watched that one more than a few times…
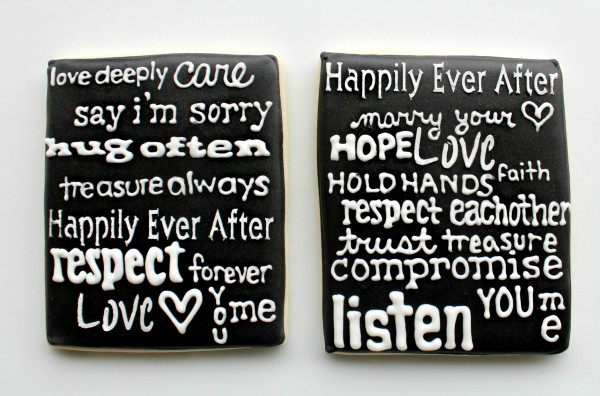
Anyway, like I said, no tutorial, just some tips and advice…

If you decide to take a stab at these, remember a few key tips: 

  • #1 and #1.5 tips are your friends
  • Stencils can help {If found this one in Michael’s by chance.  They are called Journaling Templates.  If you see some pick them up.  they are VERY handy for cookie projects}

  • Plan out what you are going to write.  Winging it does NOT work well in this case
  • Use icing that has a consistency similar to hair gel for these.  Not too stiff but not so runny that it will flow together
  • In this case, a Kopy Kake is your friend
  • Relax
  • Practice
  • PRAY
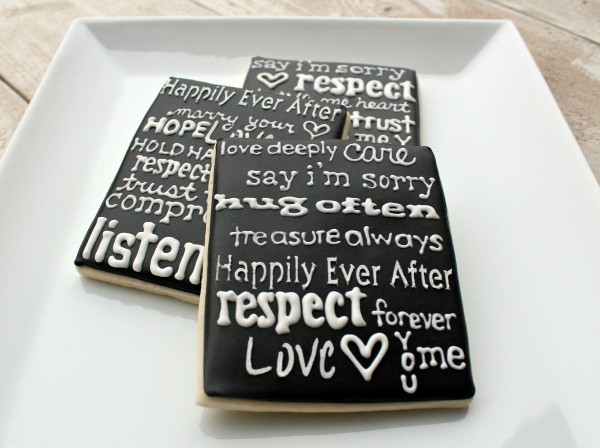
This one was my favorite.  Believe it or not, this was the first one I made.  I have beginners luck I guess.  I didn’t like the subsequent ones as much.  Seems like the more I thought about it, the more I goofed.
What are your tips for a happy marriage?  These are biggies for us.

These were a lot of work, and I am by NO MEANS an expert, but I made it through this project okay.  I think they would also be gorgeous in the popular “off-colors”, or as wedding favors, simplified by using one single phrase on a solid square rather than the whole spiel.  I’m even planning a UT version for Bern-Dogg’s birthday, but SHHHH, don’t tell him!
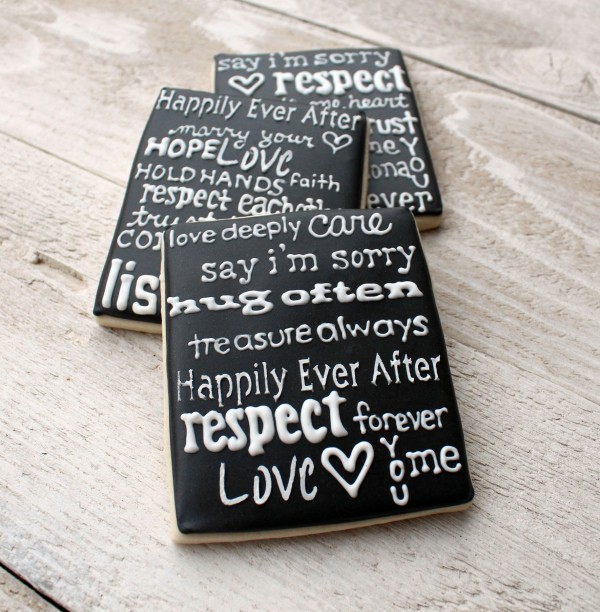
Halloween and autumn cookies have kind of distracted us, but Ashleigh and I are still cookie-ing Pinterest.  Hop on over to A Bee in Our Bonnet to see her latest creation, and stay tuned for more.  If you are just now joining in, you might want to check out these other Pinterest inspired Cookies…

How To Frost A Cupcake (courtesy of Glorious Treats)


One topic that I often receive questions on, is how to decorate cupcakes.  I've been wanting to post on this topic for some time, but wanted to do a nice complete post, something that would be a nice reference for you to come back to.  I hope this post will be a good resource for you.  I remember when I first started decorating cupcakes I too was very interested in (and intimidated by) creating a beautiful swirl on cupcakes.  After doing it only a few time I found that filling a piping bag and adding a nice swirl of frosting on cupcakes is actually much easier and quicker than spreading frosting! 

A few tips to get you started...
In order for the frosting to have enough body (be thick enough) to hold up, you need a good frosting to start with.  Make sure not to add to much liquid, or allow your ingredients to be too warm.  I would not recommend using canned (pre-made) frosting to pipe on cupcakes, it's usually not firm enough to hold up.  I have heard of people adding powdered sugar to canned frosting to thicken it... but if you are going to do that, it's just as easy to make it yourself. 

I've posted recipes for American Buttercream, and Cream Cheese Frosting, the two frostings I use most of the time.  Swiss Meringue Buttercream (explained beautifully by Rosie of Sweetapolita) also makes a beautiful frosting for piping.

(Left to Right)  Large round tip, Open star (Wilton 1M), Closed star (Wilton 2D), French tip

To frost cupcakes, you'll want to use a large (sometimes called jumbo) decorating tip.  The four most common shapes (openings) are shown above.  The Wilton 1M and 2D are often available at craft stores, the others you may have to buy on-line.  I like to use a coupler to hold my tips in place, for these large tips you'll need a large coupler as well.  Large tips can also be used without a coupler, by simply setting the tip inside the bag, then filling with frosting.

Sources-

And for a grand finale... my first ever video!  Simple and to the point, but I think it's sometimes helpful to just see something done from start to finish.  Enjoy!


Have fun experimenting with different tips and frostings.  Use concentrated gel coloring to color your frosting (like Americolor or Wilton).  Add some sprinkles, and you've got a beautiful and delicious treat! 


Several other posts you may find helpful as you learn to make beautiful cupcakes...

How to Bake Cupcakes  (tips to help you bake beautiful and delicious cupcakes)
Cupcake Liners (answers to common questions, and my favorite liners)

Happy Decorating!

Cream Cheese Frosting (courtesy of Glorious Treats)


Today, I'd like to share a recipe with you. Not just any recipe... a frosting recipe I have used dozens (maybe even hundreds) of times, and I love it each time! There are two reasons I love this recipe... one is that it's really, really easy, and the second is that it's really delicious! While I do also enjoy other styles of frosting, like Swiss Meringue Buttercream, Fluffy 7 Minute Frosting, or Whipped Ganache, this recipe for Cream Cheese Frosting is easier than any other. This is basically American style buttercream (which is butter, powdered sugar, milk), but with the addition of cream cheese. The cream cheese is really the key ingredient, since it helps off-set the sweetness of the powdered sugar, and adds to the creaminess of the butter while also removing the greasy, pure butter flavor. Another thing I really like about this recipe is that if you use these proportions, the frosting is not really over powered by the cream cheese, it take on the flavor of whatever extract or additional flavorings are added.

Vanilla Cream Cheese Frosting
½ cup (1 stick/8 Tablespoons) butter (set at room temp about 10 minutes, but should still be cool)
8 oz. cream cheese (directly from fridge)
1 teaspoon vanilla extract (always use pure vanilla extract if possible)
4 cups powdered confectioners sugar
1 to 4 Tablespoons heavy cream, heavy whipping cream (or milk- although I do like the richness that cream adds)

Directions:
*Place butter in a large mixing bowl and blend slightly. Add cream cheese and blend until combined, about 30 seconds.
*Add vanilla extract and powdered sugar and blend on low speed until combined. Increase to medium speed and beat until it begins to get fluffy.
*Slowly add the heavy cream, a little bit at a time until desired consistency is met. (Don't add too much if you want the frosting to stay in place when piped on cupcakes.)
*Beat until fluffy, about 1 minute.
*Use at once or keep refrigerated. (This frosting will keep well in the refrigerator for several days, but you may need to re-beat it for the best texture.)

The recipe above will produce a delicious VANILLA flavored frosting, here are a couple of other options to try...

For a Stronger Cream Cheese Flavor: Use an additional 4 oz. (½ block) of cream cheese. This is good for any cake/cupcake recipe that is traditionally topped with Cream Cheese Frosting, like Carrot Cake, or Red Velvet Cake.

For Chocolate Frosting: (my favorite!) add ½ cup unsweetened cocoa (I use Ghirardelli brand, it's really good). Add the cocoa powder before adding the powdered sugar, so it gets fully incorporated into the butter and cream cheese.

Strawberry, Blackberry, etc: Add 2-4 tablespoons of preserves. Depending on how chunky or seedy the preserves are, you may want to blend it in the food processor, and/or strain it through a fine strainer before adding it to the frosting. Add the preserves to the frosting mixture before adding the heavy cream. Depending on the amount of preserves you add you may need very little or no cream, especially if you want the frosting thick enough to pipe. A final option would be to add a drop of food coloring to add to the color of the preserves (for example, pink coloring for the Strawberry flavor).

* This recipe will frost about 22-24 cupcakes if you are piping a nice swirl, or even more if you just spread it on. If you're making a cake, this will frost and fill a two layer 9" cake.

American Buttercream Frosting Recipe (courtesy of Glorious Treats)


Often the most beloved element of a cupcake is the frosting.  A good frosting can elevate a simple cupcake to a delicious, rich dessert.  Classic American buttercream is surprisingly easy to make, and can be adjusted to your personal preferences using added flavorings, and adjusting the ratio of the ingredients.  American buttercream is simply a combination of butter, powdered sugar, vanilla (or other flavoring), and usually a bit of milk or cream- that's pretty much it!   The frosting I love to use the most often is my Cream Cheese Frosting, which is simply a variation on American Buttercream, with some cream cheese added.  Free free to play with this recipe and adjust it to your palate.  This is a very sweet, classic frosting that pairs well with most any flavor of cupcake.   

American Buttercream Frosting

1 cup (2 sticks) butter (salted, or unsalted)
1/4 teaspoon salt (if using unsalted butter)
4 cups powdered sugar
1 teaspoon vanilla extract (best quality available)
2-3 tablespoons heavy cream, half and half or milk.

*Optional- As mentioned above, I like a cream cheese version of this frosting best.  The cream cheese adds to the creamy texture, and cuts down on the sweetness just a bit.  If desired, for a very light cream cheese flavor add 1/2 block (4 oz). cream cheese, leaving the other ingredients (as listed above) the same.  For a more traditional cream cheese flavor, reduce the butter to 1/2 cup, and add 1 block (8 oz.) of cream cheese.  If using a full block of cream cheese, you can reduce the cream or milk to 1 tablespoon total.
    
Flavoring options- An almost unlimited number of flavoring options can be added in addition to, or instead of the vanilla.  Orange and/or lemon zest, citrus extracts, mint extract, coconut extract or the seeds of a vanilla bean are all wonderful options.  In most cases I'll still add 1/2 teaspoon of vanilla, then 1/2 teaspoon of the other flavoring.  For zest, add about 1 teaspoon fresh zest.  For chocolate buttercream, add 1/2 cup (good quality) unsweetened cocoa powder.

Directions-
* In the bowl of an electric mixer, fitted with the whisk attachment, beat butter (on medium speed) until completely smooth (30 seconds to a minute). (If you are adding cream cheese, add it now, then beat until smooth)
* Add salt (if needed).
* One cup at time, add 2 cups of powdered sugar, beating after each addition.
* Add vanilla, or other flavorings and beat to combine. 
* Add about 1 tablespoon of cream, and continue beating.
* Add the remaining 2 cups powdered sugar, one at a time.
* Add an additional 1-2 tablespoons cream until desired consistency is reached.  If you want to pipe the frosting on cupcakes, the frosting should be nice and thick.  Continue to beat another minute or so.  The frosting should now be smooth and fluffy.

Troubleshooting- 
* If your frosting is not smooth, it is likely because the butter was not fully smooth before adding the other ingredients. 
* If your frosting will not hold up when piped on cupcakes, your frosting has too much liquid or is too warm.  Put entire bowl of frosting in the fridge for 15-20 minutes and it will stiffen up.  If it is still too thin, then add 1/4 to 1/2 cup powdered sugar, beat well. 

Recipe Source-  American buttercream first appeared in cookbooks in the early 1900's (here's a little buttercream history)  Countless sources since then have included very similar versions, always using some combination of butter (or shortening), powdered sugar, milk and flavoring.  The recipe above is simply the proportions I like to use. 


Try this classic frosting on top of my favorite Vanilla Cupcakes or Chocolate Cupcakes.

Happy frosting! 

Sunday, October 2, 2011

Cute and Creepy Halloween Treats (and a free printable!) from Glorious Treats! :)

A few nights ago as I was drifting off to sleep... dreaming of future blog posts.. an idea hit me!  Everyone once in a while I impress myself  =)  I thought of a cute, creepy and funny kids snack perfect for Halloween treat bags.  And here it is....

Wait... you don't think red candies, pretzels and marshmallows are fun and creepy?

How about now....


Cute right??  Now I should apologize a bit here... I know you're used to me posting pretty, elegant, lady-like treats, but I've got to let my hair down every now and then! =)  And I can pretty much guarantee that you will never again see the word "poop" in any of my blog posts!

But I'll have to tell you, as I was making us these little treat bags, my 7 and 4 year old sweet little girls were cracking up, asking for "more spider legs please.." and "can I have 3 more rat eyes".


I created a special (free!) printable bag topper just for these cute and creepy treats. 
Simply follow the link below to get your... 

I would recommend printing them onto white cardstock, then use a paper trimmer to cut them.  The finished size of each topper will be 4" wide and 3" tall.  Fold them in half (lenghtwise), then use double sided tape to attach them to the bags.  Before I added the tags I folded the bag over a couple times and stapled it closed. 

To make these Halloween treat bags you'll need...
Red candies (I used sixlets)
Pretzel Sticks
Mini Marshmallows
Small clear treat bags
Printable topper (link above)
Gray twine (optional)  I used twine from The Twinery, in stone.


I've posted a cute Halloween packaging idea in the the past, if you're looking for something a little less gross.

Happy Snacking!